[카테고리:] Recipes

A collection of French-inspired recipes from a Korean baker in London, sharing the joy of homemade baking.

  • Lemon Madeleines

    Lemon Madeleines Recipe | Soft, Buttery French Butter Cakes with Fresh Lemon

    If you’re looking for a classic Lemon Madeleines recipe, you’ve come to the right place. These delicate French butter cakes are known for their signature shell shape, light sponge texture, and rich buttery flavor. Adding fresh lemon zest gives them a bright citrus aroma that perfectly balances the sweetness.

    Whether you’re a beginner or an experienced home baker, this easy homemade Lemon Madeleines recipe is perfect for afternoon tea, dessert, or a special treat with coffee.


    What Are Lemon Madeleines?

    Madeleines are traditional French sponge cakes baked in a shell-shaped mold. Although they look like cookies, their texture is soft, light, and cake-like.

    Lemon Madeleines are made with fresh lemon zest, giving each bite a refreshing citrus flavor while maintaining the buttery richness that makes this classic pastry so popular.


    Ingredients

    For the Lemon Madeleines

    • 2 large eggs
    • 100g granulated sugar
    • 100g cake flour
    • 3g baking powder
    • 100g unsalted butter, melted and cooled
    • 20g honey
    • Zest of 1 fresh lemon
    • 1 tsp vanilla extract
    • Pinch of salt

    Instructions

    Step 1: Prepare the Batter

    Whisk the eggs and sugar until the mixture becomes pale and slightly thick.

    Add the honey, vanilla extract, lemon zest, and salt, mixing until well combined.

    Sift the cake flour and baking powder into the mixture, then gently fold until no dry flour remains.

    Finally, slowly add the cooled melted butter and mix until smooth.


    Step 2: Rest the Batter

    Cover the bowl with plastic wrap, making sure it touches the surface of the batter.

    Refrigerate for at least 4 hours or overnight.

    Resting the batter helps develop flavor and encourages the signature Madeleine hump during baking.


    Step 3: Prepare the Pan

    Lightly butter a madeleine pan and dust it with a small amount of flour if desired.

    Fill each cavity about three-quarters full with chilled batter.


    Step 4: Bake

    Preheat the oven to 200°C (392°F).

    Bake for 5 minutes, then reduce the temperature to 180°C (356°F) and continue baking for another 5–7 minutes, or until the edges are golden brown.

    The centers should rise into the classic Madeleine hump.


    Tips for Perfect Lemon Madeleines

    • Always use fresh lemon zest for the best citrus flavor.
    • Chilling the batter is the secret to achieving the signature hump.
    • Do not overmix the batter after adding the flour.
    • High-quality unsalted butter creates a richer flavor.
    • Bake immediately after removing the batter from the refrigerator.

    Storage

    Store Lemon Madeleines in an airtight container at room temperature for up to 2 days.

    For longer storage, wrap each madeleine individually and freeze for up to 2 weeks. Allow them to thaw at room temperature before serving.


    Serving Suggestions

    Lemon Madeleines pair beautifully with:

    • Coffee
    • Earl Grey tea
    • Green tea
    • Fresh berries
    • Lemon glaze or powdered sugar

    They also make a wonderful homemade gift for birthdays, holidays, or afternoon tea parties.


    Final Thoughts

    These homemade Lemon Madeleines are buttery, soft, and filled with fresh citrus flavor. With a simple batter and a little resting time, you can create authentic French-style Madeleines that are perfect for any occasion.

    If you enjoy baking classic French pastries, this Lemon Madeleines recipe is one you’ll want to make again and again. Fresh from the oven with a cup of coffee, they’re simply irresistible.
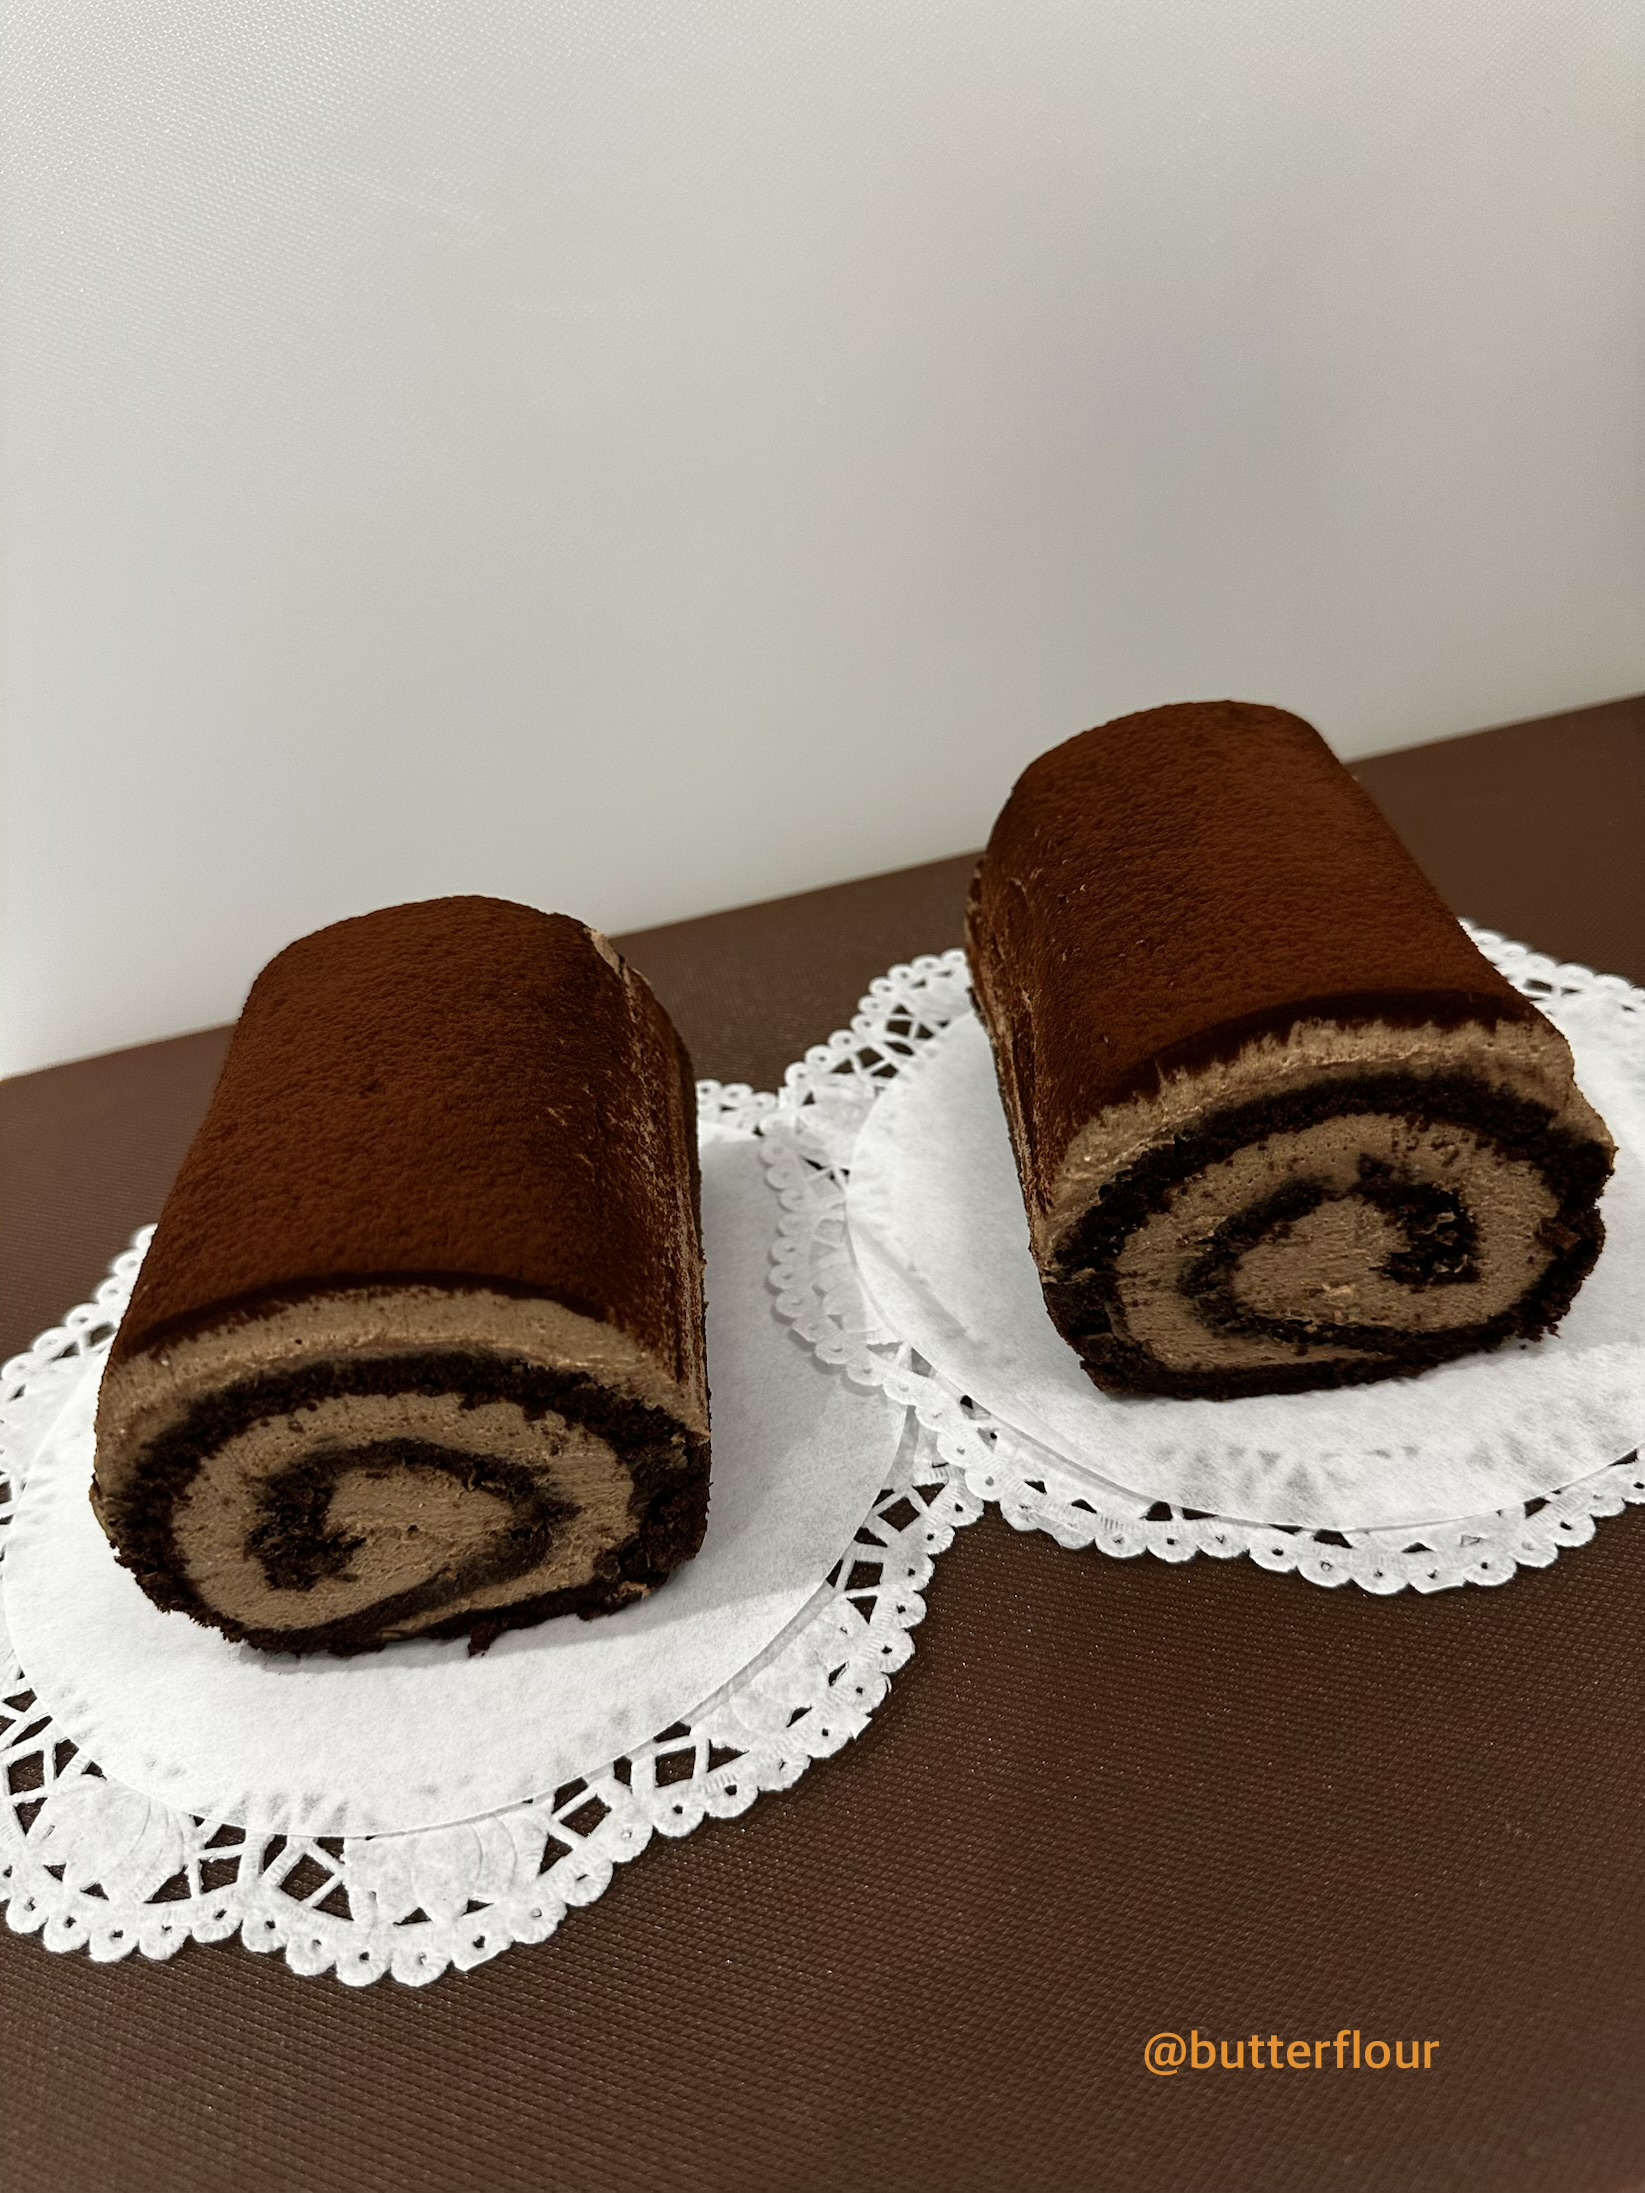
  • Chocolate Roll Cake-Swiss Roll

    🍫 Moist Chocolate Roll Cake Recipe | Homemade Swiss Roll (Soft Chocolate Cake Roll)

    Making a chocolate roll cake at home is easier than it looks, and with the right technique, you can achieve a soft, moist, bakery-style Swiss roll.

    In this guide, you’ll learn a reliable chocolate roll cake recipe, including key tips for a fluffy sponge and smooth chocolate whipped cream.


    🍰 Ingredients for Chocolate Roll Cake

    ✔ Chocolate Sponge Cake

    • 4 eggs
    • 90g sugar
    • 70g cake flour (soft wheat flour)
    • 20g cocoa powder
    • 40ml milk
    • 30g unsalted butter
    • 1 tsp vanilla extract

    ✔ Chocolate Whipped Cream Filling

    • 250ml heavy cream
    • 20g sugar
    • 10g cocoa powder

    👉 Key point: The balance between sponge and cream determines the final texture and taste.


    How to Make Chocolate Roll Cake (Step-by-Step)


    Whip the Eggs (Most Important Step)

    Whip eggs and sugar until the mixture becomes thick, pale, and falls like a ribbon.

    👉 This step is essential for a soft and fluffy chocolate roll cake.


    Fold in Dry Ingredients

    Sift cake flour and cocoa powder together, then gently fold into the batter.

    👉 Do not overmix, or the sponge will become dense.


    Bake the Chocolate Sponge

    Spread the batter evenly into a baking tray.

    Bake at 170°C (340°F) for 12–15 minutes.

    👉 Do not overbake — this is key to a moist roll cake.


    Make Chocolate Whipped Cream

    Whip cold heavy cream with sugar and cocoa powder until soft peaks form.

    👉 Be careful not to overwhip, or the cream may separate.


    Assemble the Roll Cake

    Spread whipped cream evenly over the cooled sponge.

    Roll tightly from one side using baking paper, then wrap and chill for at least 1 hour.

    👉 Resting helps create a clean, beautiful slice.


    🍫 Tips for the Best Chocolate Roll Cake

    ✔ Proper egg whipping creates volume and softness
    ✔ Always sift cocoa powder to avoid lumps
    ✔ Avoid overbaking for a moist texture
    ✔ Chill before slicing for a clean swirl pattern


    Storage Instructions

    • Refrigerator: 2–3 days
    • Freezer: up to 2 weeks

    👉 Thaw in the fridge before serving to restore softness.


    🍰 Final Thoughts

    This homemade chocolate roll cake is soft, moist, and perfect with coffee or milk. With a few simple techniques, you can easily recreate a bakery-style Swiss roll at home.

    The key to success is simple:
    👉 Whip the eggs properly
    👉 Do not overbake
    👉 Chill before slicing

    Enjoy your homemade chocolate roll cake!

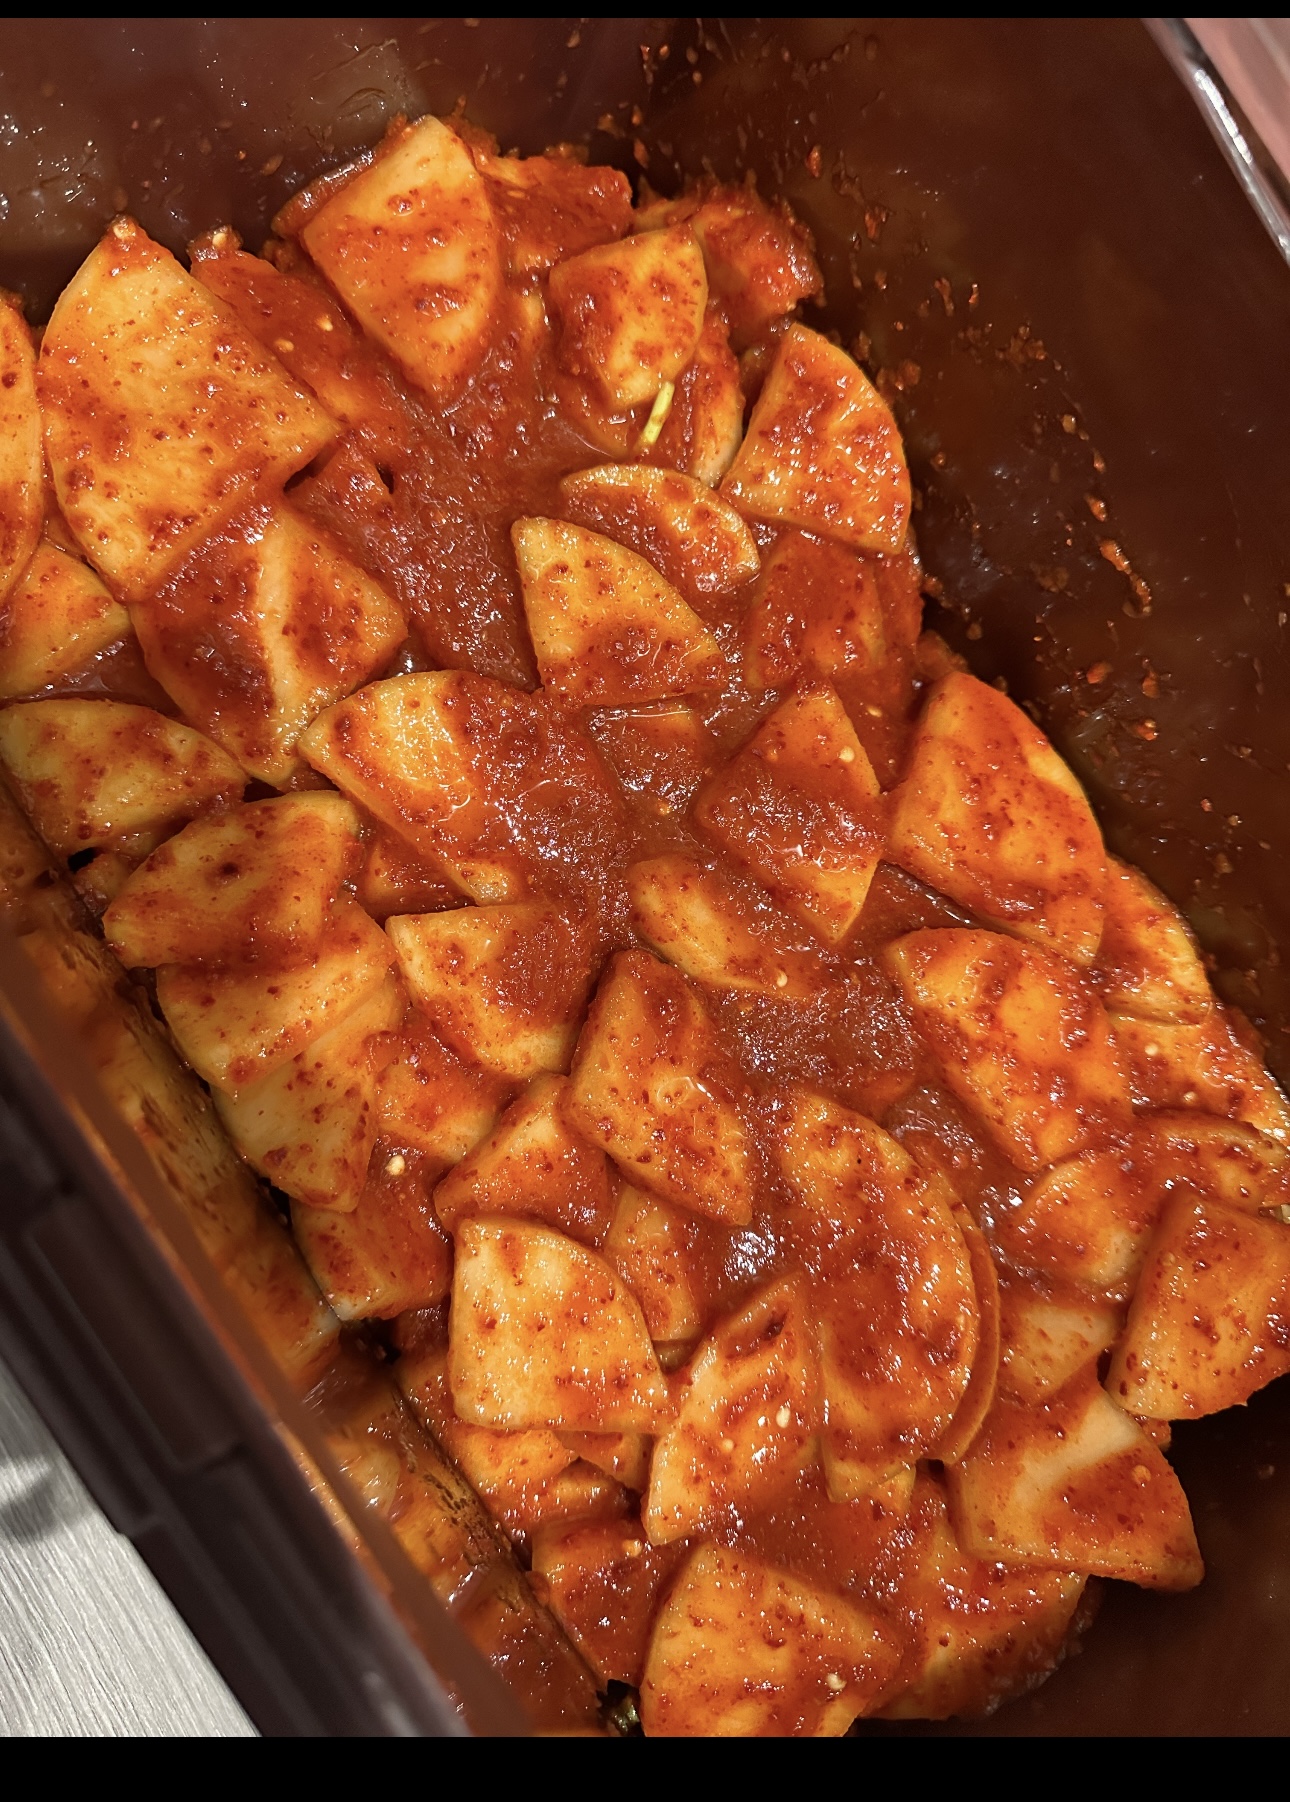
  • Korean Radish Kimchi

    Easy Kkakdugi (Korean Radish Kimchi)

    Kkakdugi is one of Korea’s most beloved side dishes. Made with crisp Korean radish, garlic, ginger, and Korean chilli flakes, it has a refreshing crunch and a bold, spicy flavour that develops beautifully as it ferments.

    It pairs perfectly with hearty soups such as seolleongtang, galbitang, and kimchi fried rice, but it’s just as delicious served alongside a simple bowl of steamed rice.

    If you’ve never made kimchi before, this is a wonderful recipe to start with.


    Ingredients

    • 1 large Korean radish (about 1kg)
    • 2 tbsp sea salt
    • 1 tbsp sugar

    Seasoning

    • 3 tbsp gochugaru (Korean chilli flakes)
    • 2 tbsp fish sauce
    • 1 tbsp salted shrimp (optional)
    • 4 garlic cloves, minced
    • 1 tsp grated ginger
    • 2 spring onions, sliced
    • 1 tsp sugar (optional)

    Instructions

    1. Prepare the radish

    Peel the radish and cut it into 2–3cm cubes.

    Place the cubes in a large bowl and mix with the salt and sugar. Leave for 40–60 minutes, stirring once or twice. This helps draw out excess moisture while keeping the radish crisp.

    2. Drain

    Drain away the liquid that has collected. There’s no need to rinse the radish unless it tastes overly salty.

    3. Make the seasoning

    In a separate bowl, combine the gochugaru, fish sauce, salted shrimp (if using), garlic, ginger, spring onions, and sugar.

    Mix until a thick paste forms.

    4. Coat the radish

    Add the seasoning paste to the radish cubes and gently toss until every piece is evenly coated.

    5. Ferment

    Transfer the kkakdugi to a clean glass container or kimchi box.

    Leave it at room temperature for one day before refrigerating.

    The flavour will continue to develop over the next few days.


    Serving Suggestions

    Kkakdugi is delicious with:

    • Seolleongtang (Ox Bone Soup)
    • Galbitang (Beef Short Rib Soup)
    • Samgyetang (Ginseng Chicken Soup)
    • Fried Rice
    • Grilled Meat
    • Simple steamed rice

    Tips

    • Korean radish gives the best flavour and texture, but daikon radish can also be used.
    • Adjust the amount of gochugaru depending on your preferred spice level.
    • The kimchi tastes even better after 3–5 days in the refrigerator.
    • Store in the fridge for up to one month.

    Final Thoughts

    Homemade kkakdugi is surprisingly easy to prepare and tastes far fresher than store-bought versions. The combination of crunchy radish, savoury seasoning, and gentle fermentation creates a side dish that complements almost any Korean meal.

    Whether you’re new to Korean cooking or grew up enjoying homemade kimchi, this recipe is simple, reliable, and full of authentic flavour.

    Happy cooking!


    Category: Recipes

    Tags: Korean Food, Kkakdugi, Kimchi, Korean Recipe, Homemade, Side Dish

  • Financiers

    Financiers (French Almond Butter Cakes)

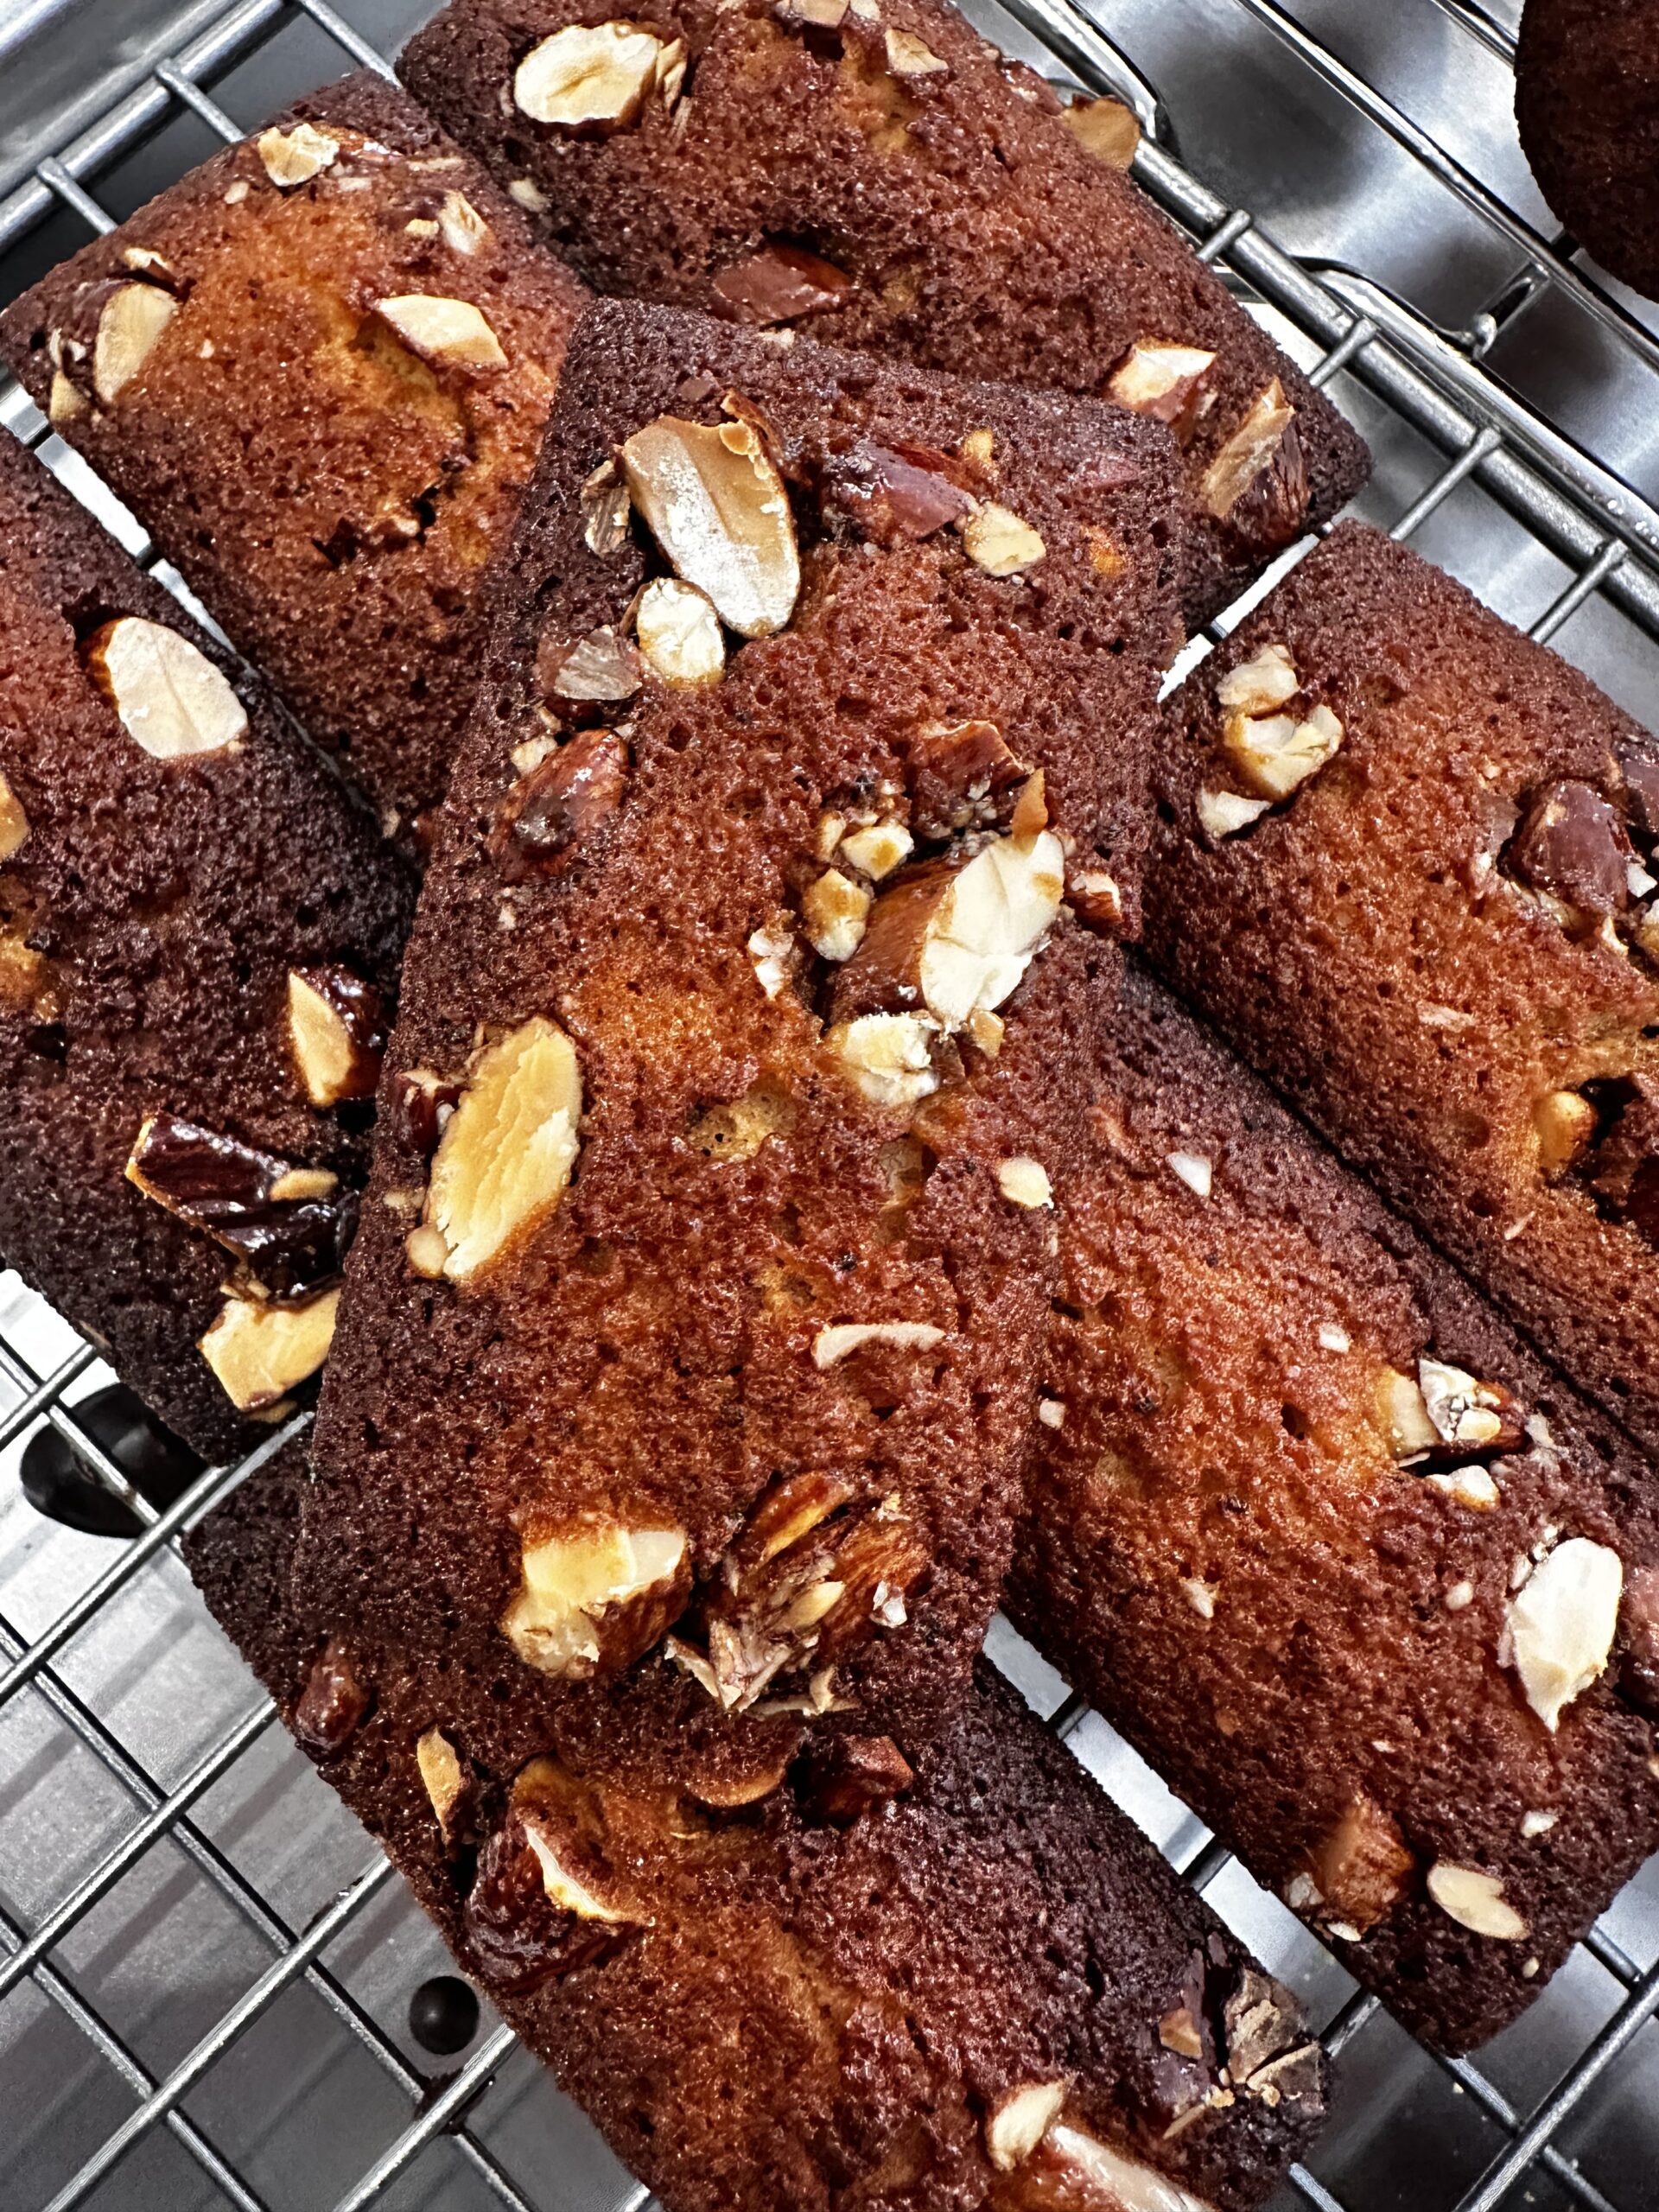
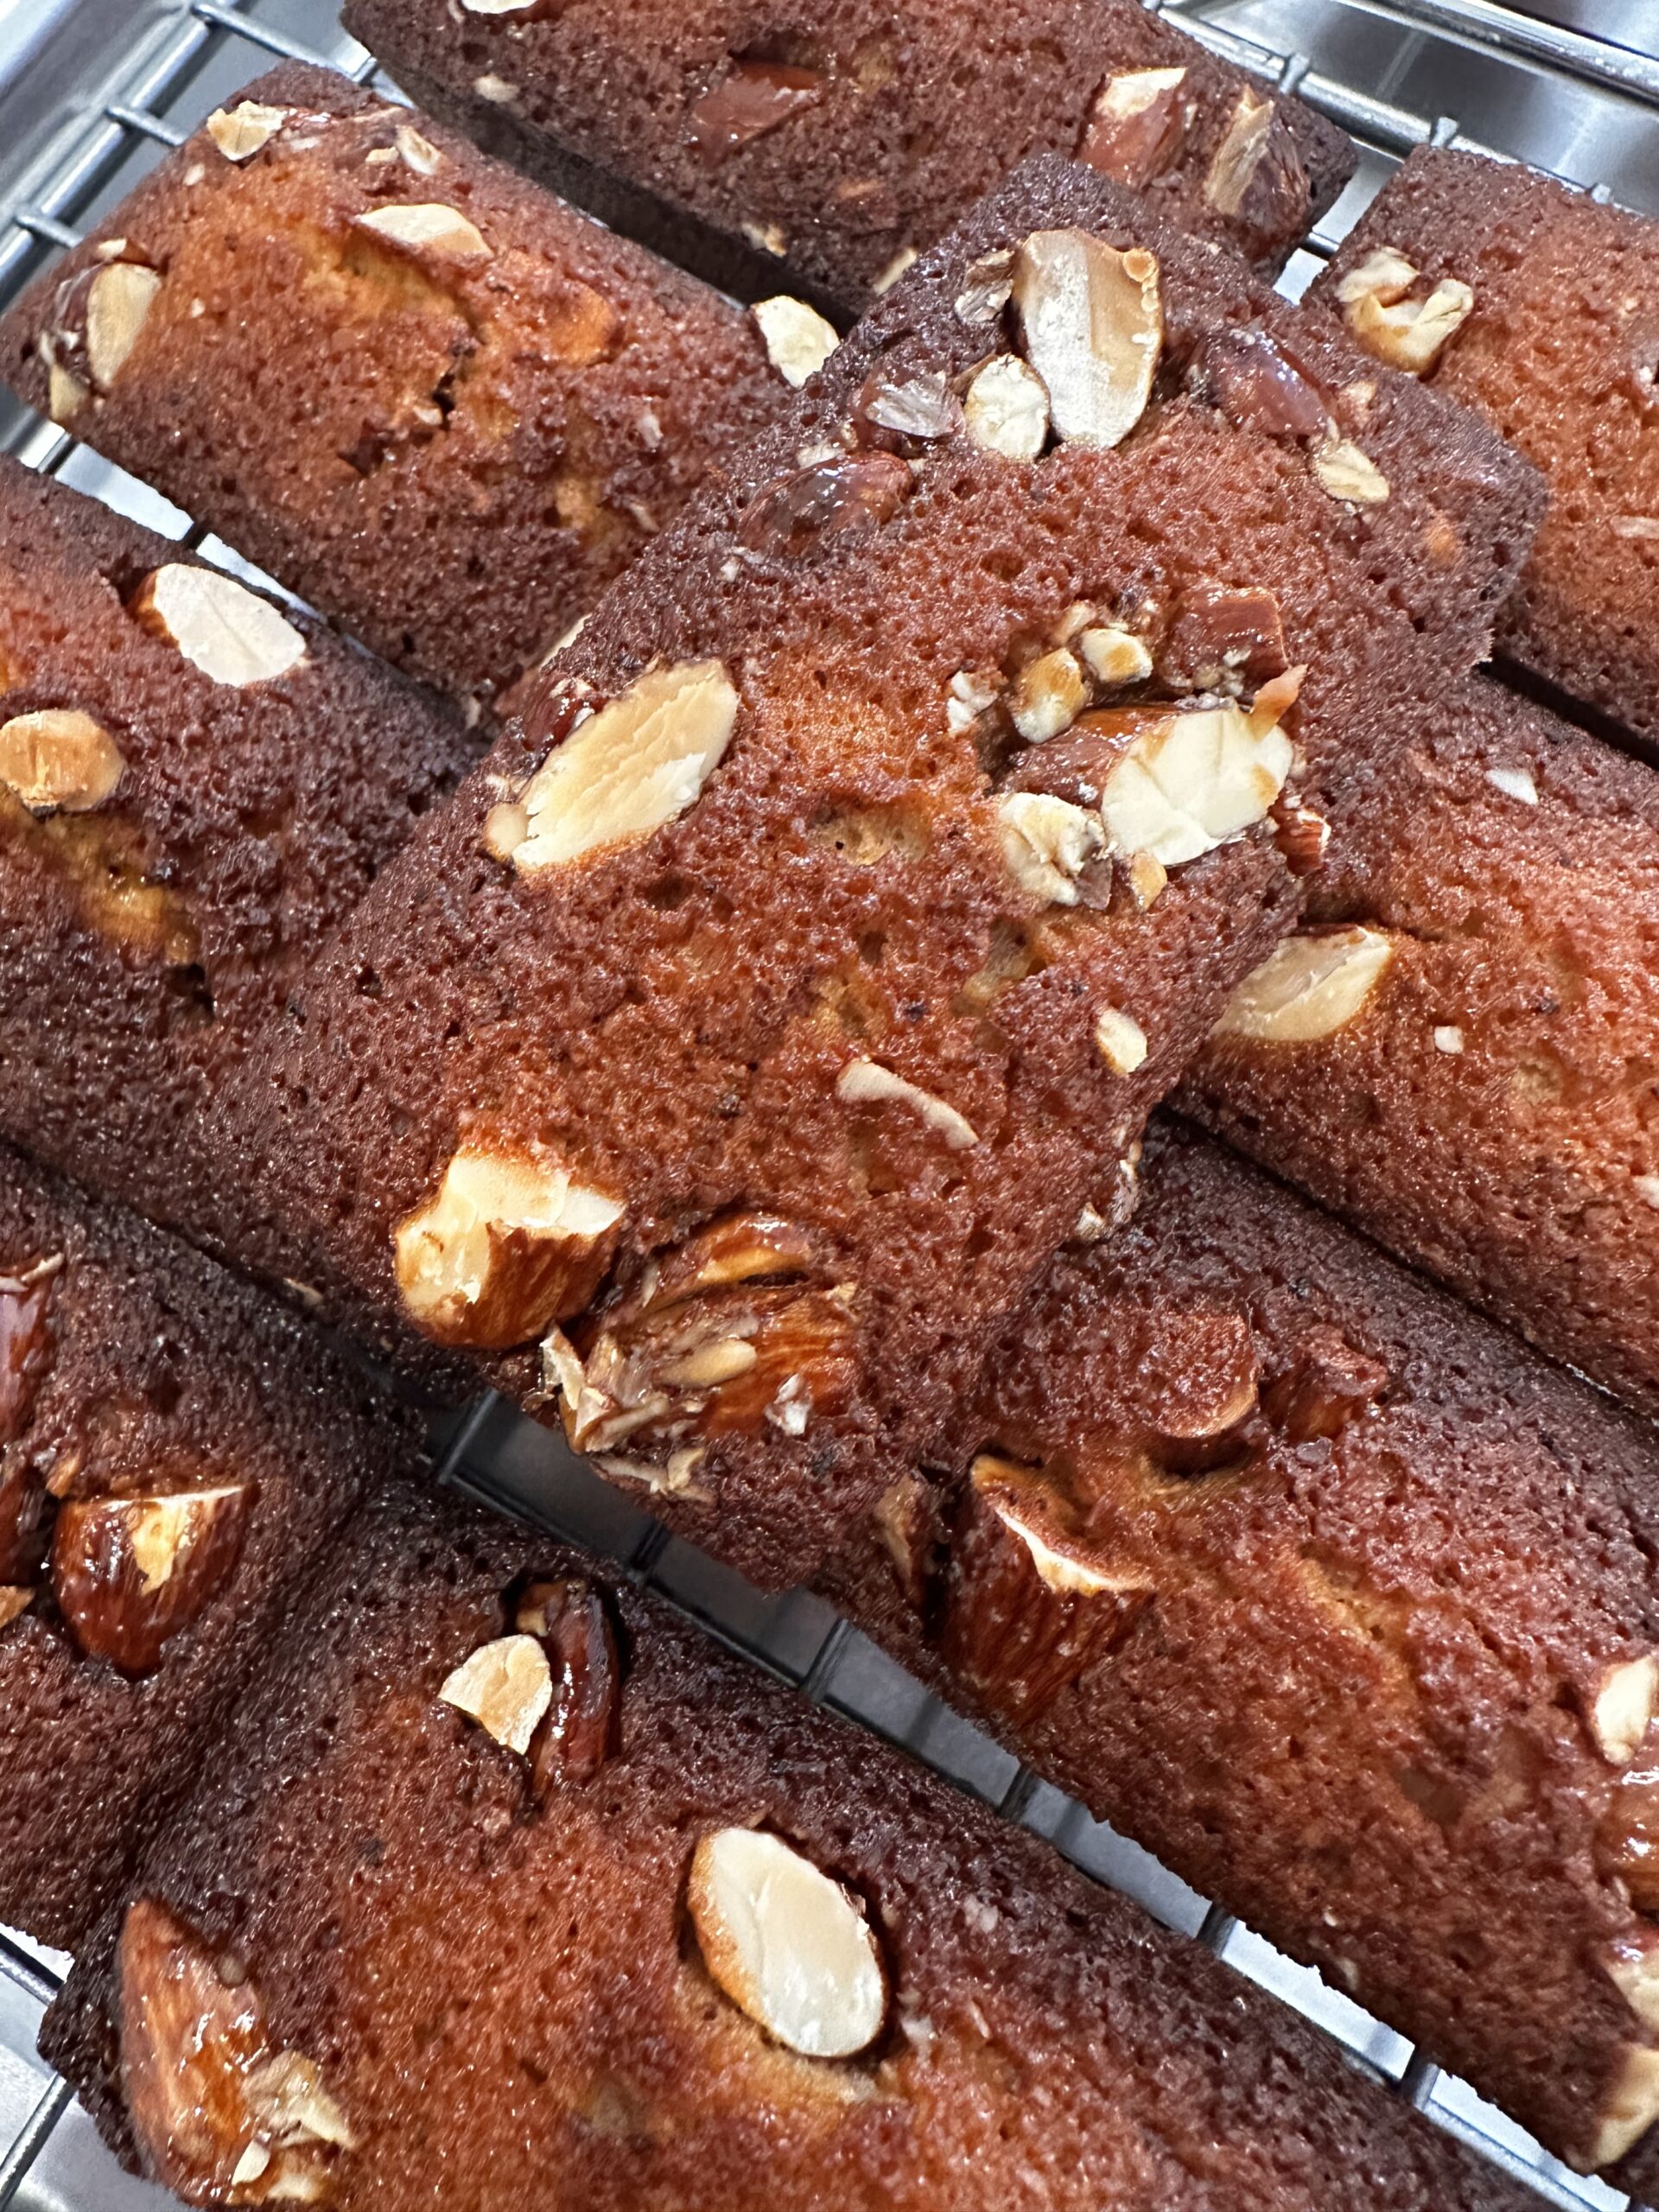
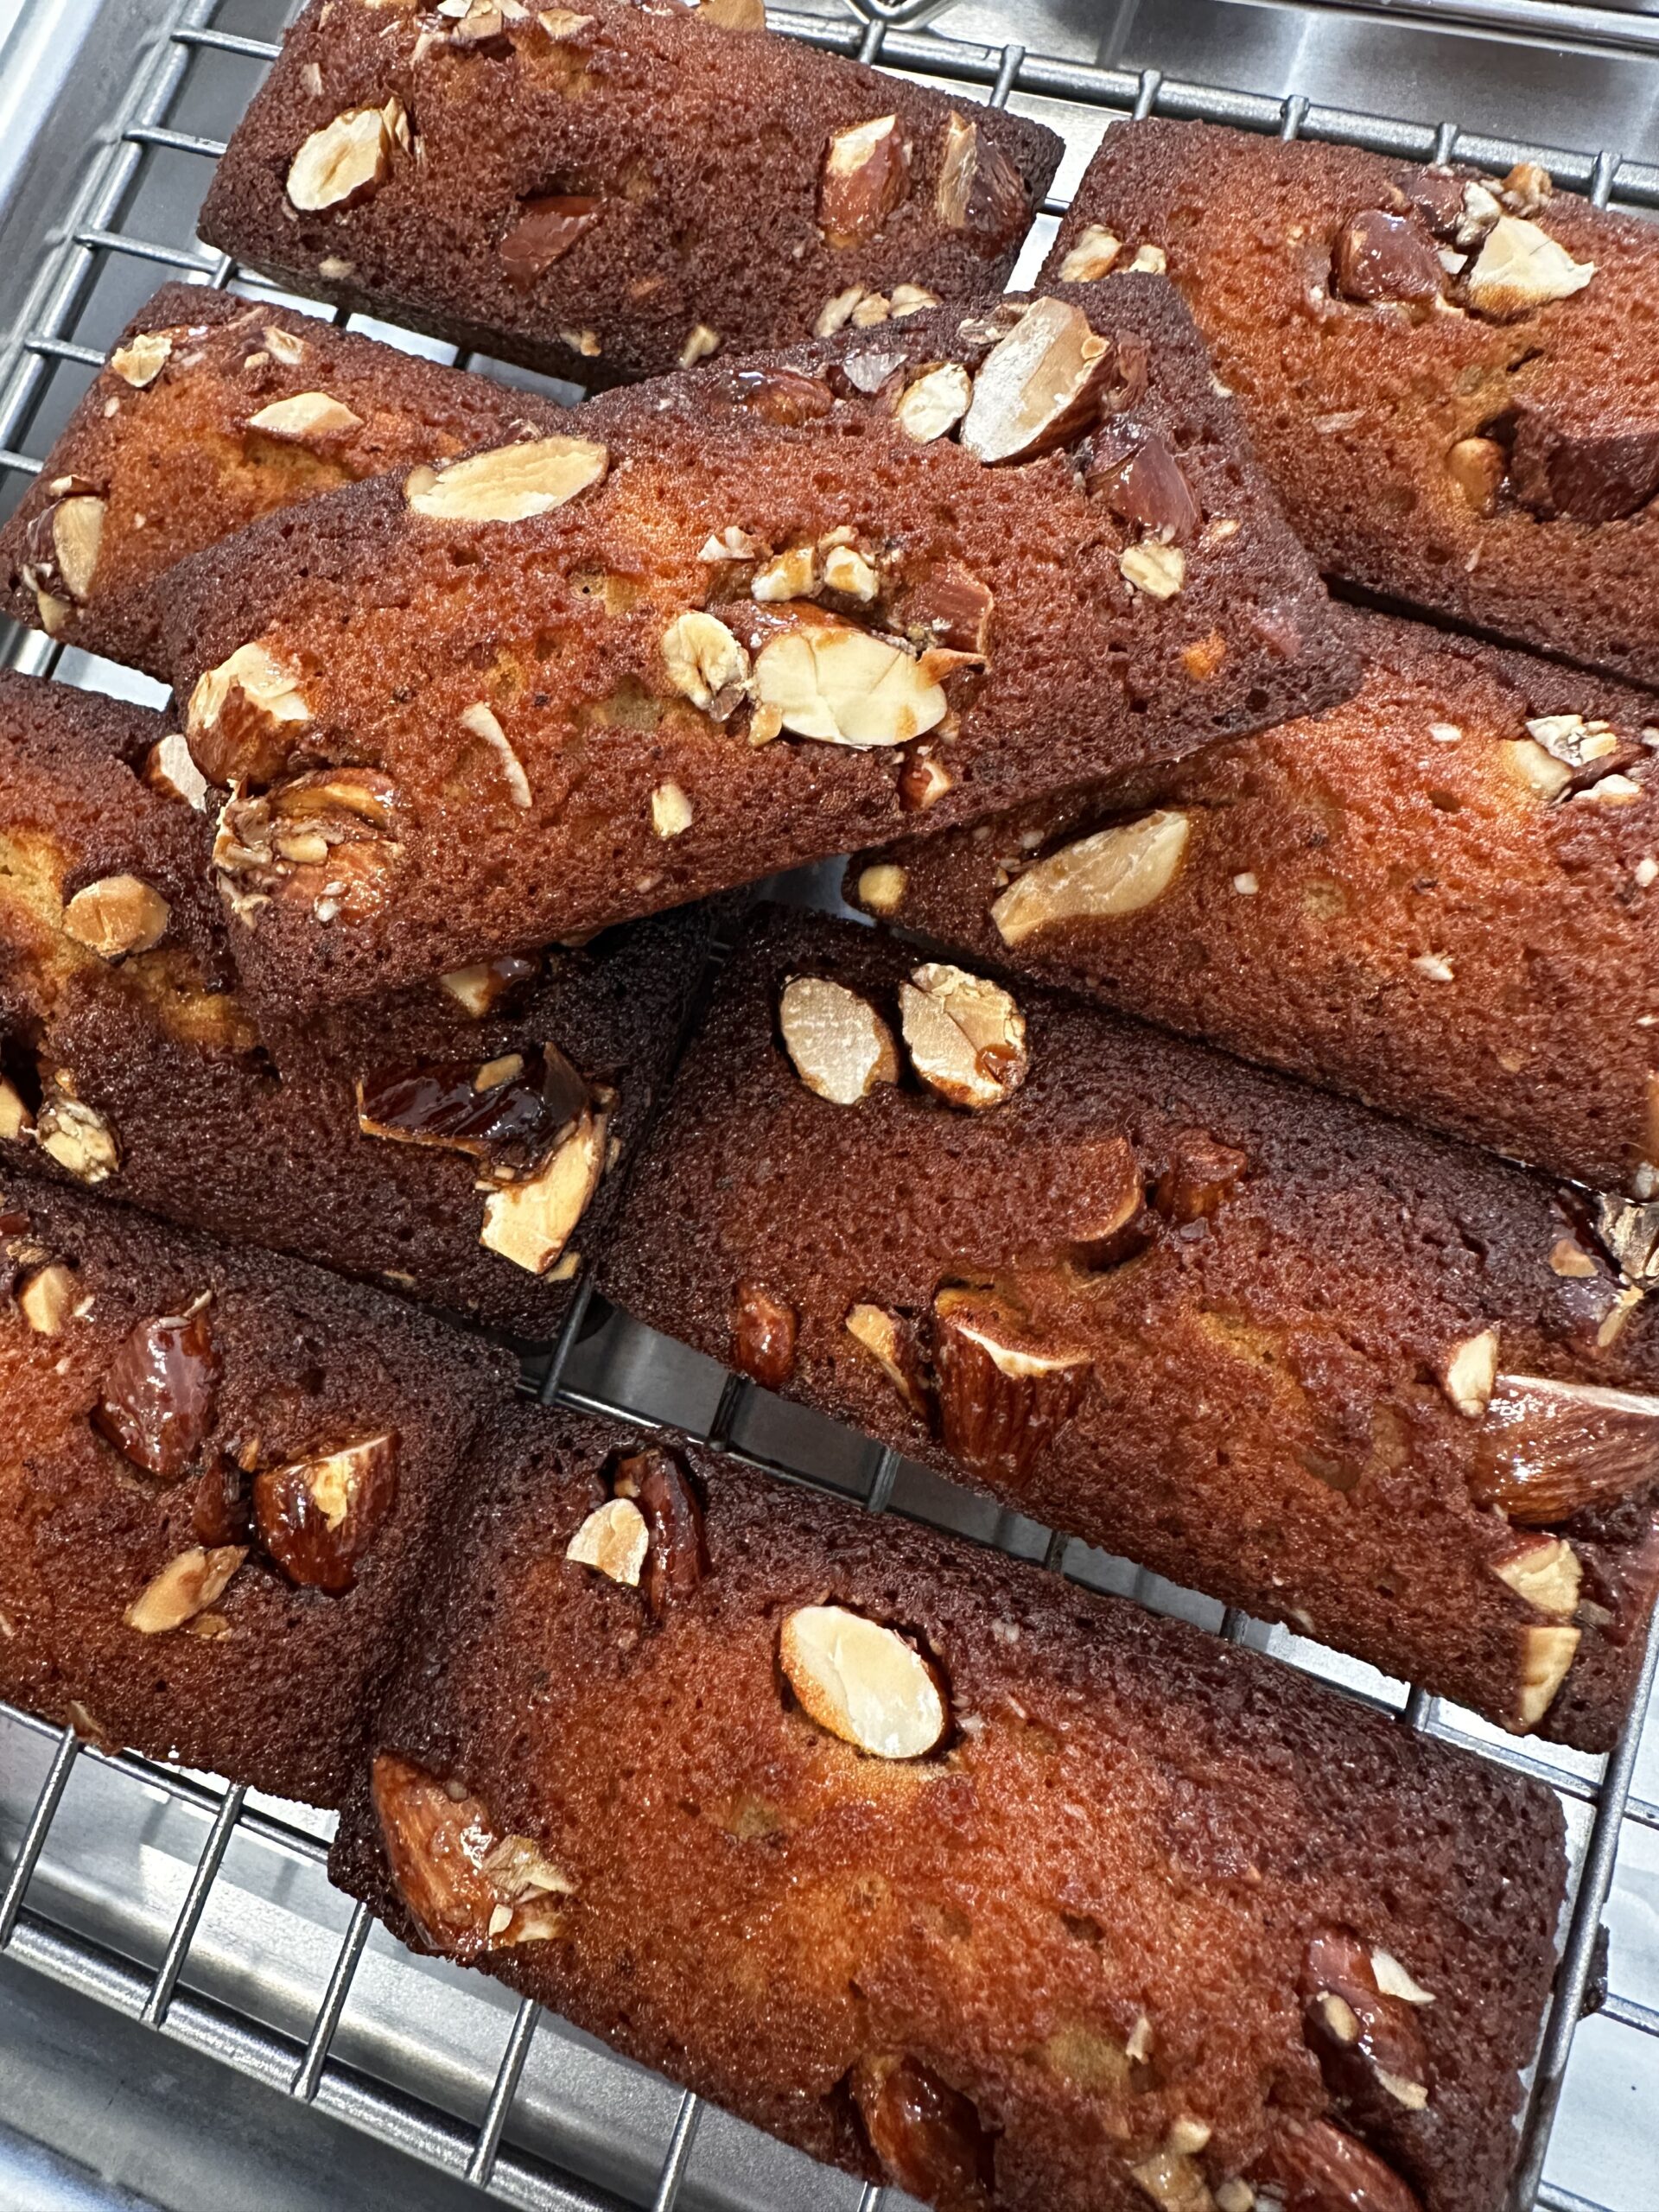
    There is something wonderfully elegant about a classic French financier. These small almond cakes are known for their crisp golden edges, soft and buttery centre, and rich nutty flavour from browned butter. Despite their refined appearance, financiers are surprisingly simple to make and are perfect for using up leftover egg whites.

    Whether enjoyed with a morning coffee or served alongside afternoon tea, these little cakes never fail to impress.


    Ingredients (Makes 10–12)

    • 100g unsalted butter
    • 100g icing sugar
    • 50g plain flour
    • 80g ground almonds
    • 4 egg whites (about 120g)
    • 1 tsp vanilla extract
    • A pinch of salt

    Optional:

    • Sliced almonds for topping

    Instructions

    1. Brown the butter

    Place the butter in a saucepan over medium heat. Allow it to melt and continue cooking until it turns golden brown and develops a nutty aroma. Remove from the heat and let it cool slightly.

    2. Prepare the dry ingredients

    In a large bowl, whisk together the icing sugar, plain flour, ground almonds and salt.

    3. Add the egg whites

    Lightly whisk the egg whites until just frothy. There is no need to whip them into a meringue. Add them to the dry ingredients along with the vanilla extract and mix until combined.

    4. Pour in the browned butter

    Slowly add the warm browned butter while gently mixing until the batter is smooth.

    5. Rest the batter

    Cover the bowl and refrigerate for at least 30 minutes. Resting the batter helps create the classic crisp edges and tender crumb.

    6. Bake

    Preheat the oven to 180°C (350°F).

    Grease your financier moulds or mini loaf tins and fill each cavity about three-quarters full.

    If desired, top with a few sliced almonds.

    Bake for 15–18 minutes, or until the cakes are golden brown and spring back lightly when touched.

    7. Cool

    Allow the financiers to cool in the moulds for 5 minutes before transferring them to a wire rack.


    Baker’s Notes

    • Brown butter is the secret ingredient that gives financiers their signature flavour.
    • The batter can be refrigerated overnight, making it ideal for baking fresh the next day.
    • Financiers pair beautifully with coffee, tea, or fresh berries.
    • Store in an airtight container for up to 3 days.

    Final Thoughts

    These classic French financiers are simple, elegant, and incredibly satisfying. With their delicate almond flavour and buttery richness, they are perfect for afternoon tea, special occasions, or whenever you’re craving a little taste of France.

    If you try this recipe, I’d love to hear how it turned out. Happy baking!


    Category: Recipes

    Tags: Financiers, French Pastry, Almond, Brown Butter, Baking, Tea Time

  • Chocolate Chip Cookies

    Chocolate Chip Cookies Recipe (Easy Homemade Guide)

    Chocolate chip cookies are one of the most popular homemade baked goods around the world. They are soft, slightly crispy on the edges, and filled with rich melted chocolate pieces. This simple recipe is perfect for beginners and can be made with basic ingredients found in most kitchens.

    Ingredients

    To make classic chocolate chip cookies, you will need:

    • 125g unsalted butter (softened)
    • 100g brown sugar
    • 50g white sugar
    • 1 large egg
    • 1 tsp vanilla extract
    • 200g plain flour
    • 1/2 tsp baking soda
    • A pinch of salt
    • 150g chocolate chips or chopped chocolate

    Instructions

    1. Prepare the mixture

    In a large bowl, cream together the softened butter, brown sugar, and white sugar until light and fluffy.

    2. Add wet ingredients

    Mix in the egg and vanilla extract until fully combined.

    3. Add dry ingredients

    In a separate bowl, combine flour, baking soda, and salt. Slowly add the dry mixture into the wet ingredients and mix until a dough forms.

    4. Add chocolate

    Fold in the chocolate chips evenly throughout the dough.

    5. Chill the dough (recommended)

    For better texture and flavour, chill the dough in the fridge for at least 30–60 minutes.

    6. Bake

    Preheat the oven to 180°C (356°F).
    Place spoonfuls of dough onto a baking tray lined with parchment paper.

    Bake for 10–12 minutes or until the edges are golden brown.

    7. Cool

    Let the cookies cool on the tray for 5 minutes before transferring to a wire rack.

    Baking Tips for Better Cookies

    • Use brown sugar for a softer texture and richer flavour
    • Do not overmix the dough once flour is added
    • Chilling the dough improves flavour and prevents spreading
    • Slightly underbake for softer cookies

    Chocolate chip cookies are simple to make but highly rewarding. With the right balance of ingredients and proper baking technique, you can achieve bakery-style cookies at home.

  • Ultimate Guide to Baking 2

    How to Improve Your Sourdough Bread at Home (Expanded)

    How to Improve Your Sourdough Bread at Home

    Sourdough baking is a combination of science, timing, and ingredient quality. While technique is important, the quality of your flour and your fermentation process play an equally significant role in the final result.

    Improving sourdough bread at home often comes down to consistency and understanding how each element affects dough development.


    Understanding sourdough fermentation

    Sourdough relies on natural fermentation rather than commercial yeast. This means wild yeast and lactic acid bacteria work together to ferment the dough.

    Fermentation affects:

    • Dough rise
    • Texture
    • Flavour development
    • Digestibility

    A slow and controlled fermentation process usually produces better flavour and structure.


    Key factors that improve sourdough bread

    1. Use high-quality flour

    Flour is the foundation of sourdough. Strong flour or high-quality stoneground flour provides the protein needed to develop gluten structure.

    More protein means stronger gluten networks, which help trap gas during fermentation and improve rise.


    2. Maintain a healthy starter

    Your sourdough starter is the engine of the process. A strong starter should:

    • Double in size after feeding
    • Smell pleasantly sour but not unpleasant
    • Show consistent bubbling activity

    Feeding it regularly helps maintain yeast strength and fermentation balance.


    3. Control hydration levels

    Hydration refers to the amount of water in your dough. Higher hydration doughs often produce more open crumb structures, but they can be harder to handle.

    Beginners may benefit from slightly lower hydration until they gain more experience.


    4. Allow proper fermentation time

    One of the most common mistakes in sourdough baking is rushing fermentation.

    Longer fermentation improves:

    • Flavour complexity
    • Dough strength
    • Digestibility

    Both bulk fermentation and final proofing stages should be carefully monitored.


    5. Temperature control

    Temperature affects fermentation speed. Warmer environments speed up fermentation, while cooler environments slow it down.

    Consistency in temperature helps produce more predictable results.


    Common mistakes to avoid

    • Using inactive starter
    • Under-proofing or over-proofing dough
    • Inconsistent feeding schedule
    • Using low-protein flour for bread

    Avoiding these mistakes significantly improves your results.


    Final thoughts

    Improving sourdough bread at home is a gradual process. With the right flour, a healthy starter, and controlled fermentation, even beginners can achieve bakery-quality results over time.

  • Ultimate Guide to Baking 1

    What Is Stoneground Flour and Why It Matters in Baking (Expanded)

    What Is Stoneground Flour and Why It Matters in Baking

    Stoneground flour is made by slowly grinding whole grains between traditional millstones. Unlike modern high-speed industrial milling, this slower process helps preserve more of the grain’s natural nutrients, flavour, and texture.

    Because the grains are not exposed to excessive heat during milling, stoneground flour retains more of the wheat germ and bran. These parts of the grain contain essential nutrients, healthy oils, and natural fibre that are often removed in highly refined flours.


    How stoneground flour is made

    The process begins with whole grains such as wheat, spelt, or rye. These grains are fed between two large millstones that rotate slowly. Instead of cutting and separating the grain quickly like modern steel rollers, the stones gently crush it.

    This traditional method produces flour that is slightly coarser in texture and more variable in particle size. However, this variation is often seen as a benefit in artisan baking.


    Benefits of stoneground flour

    Stoneground flour is widely used by artisan bakers for several reasons:

    1. Better flavour

    The natural oils and bran contribute to a richer, nuttier, and more complex flavour compared to standard white flour.

    2. Higher nutritional value

    Because the grain is less refined, stoneground flour contains more fibre, vitamins, and minerals.

    3. Improved fermentation

    In sourdough baking, the natural enzymes and nutrients in stoneground flour can support stronger fermentation activity.

    4. More rustic texture

    Baked goods made with stoneground flour often have a denser, more rustic texture, which many bakers prefer.


    Stoneground flour vs industrial flour

    Industrial roller-milled flour is designed for efficiency and consistency. It removes the bran and germ to create a very fine, uniform powder.

    While this makes baking more predictable, it also reduces flavour and nutritional content.

    Stoneground flour, on the other hand:

    • Retains more natural grain components
    • Has a stronger flavour profile
    • Produces less uniform but more character-rich baked goods

    Best uses for stoneground flour

    Stoneground flour works especially well in:

    • Sourdough bread
    • Artisan loaves
    • Rustic pizza dough
    • Whole grain baking recipes

    It may not always be ideal for delicate pastries or cakes, where a lighter texture is required.


    Final thoughts

    Stoneground flour is valued by bakers who prioritise flavour, nutrition, and traditional baking methods. While it may not always behave like refined flour, its depth of character makes it a preferred choice for high-quality artisan baking.

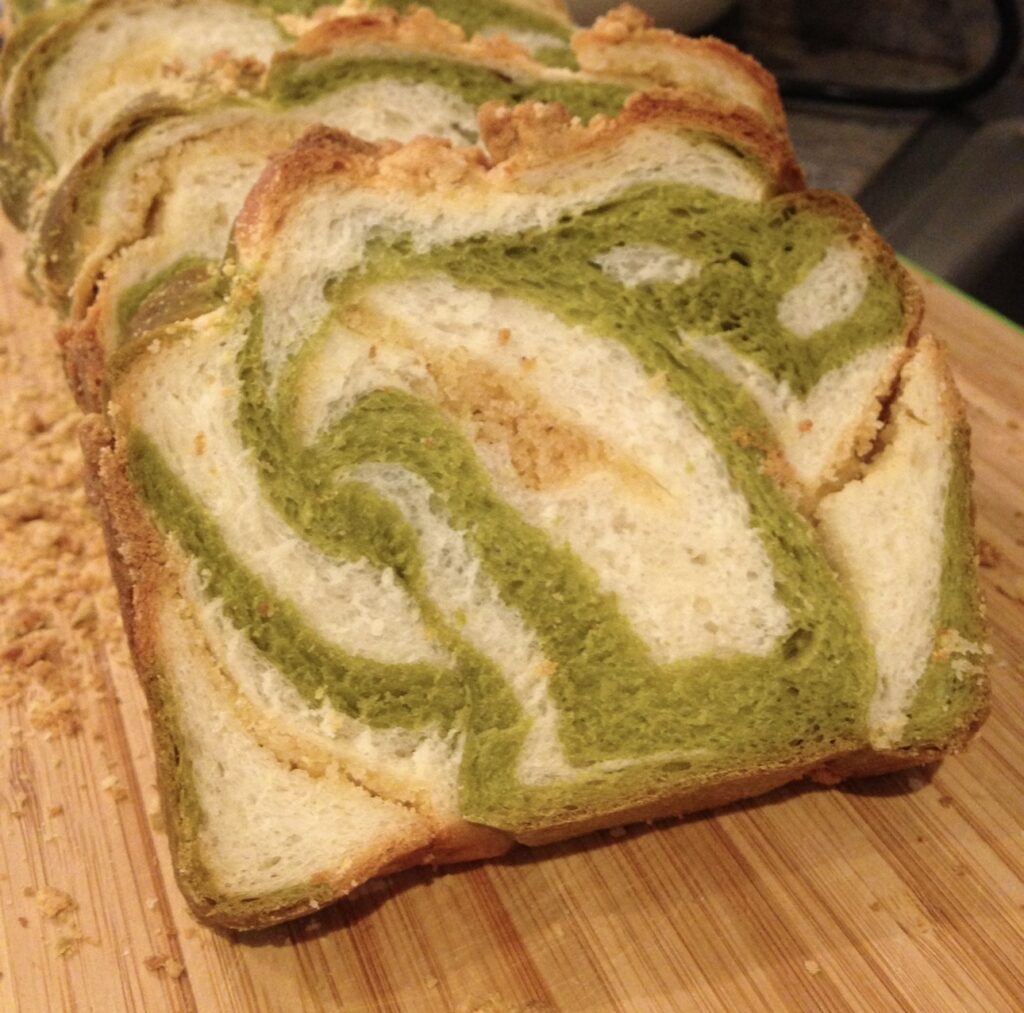
  • Matcha & White Chocolate Marble Milk Bread

    Matcha & White Chocolate Marble Milk Bread

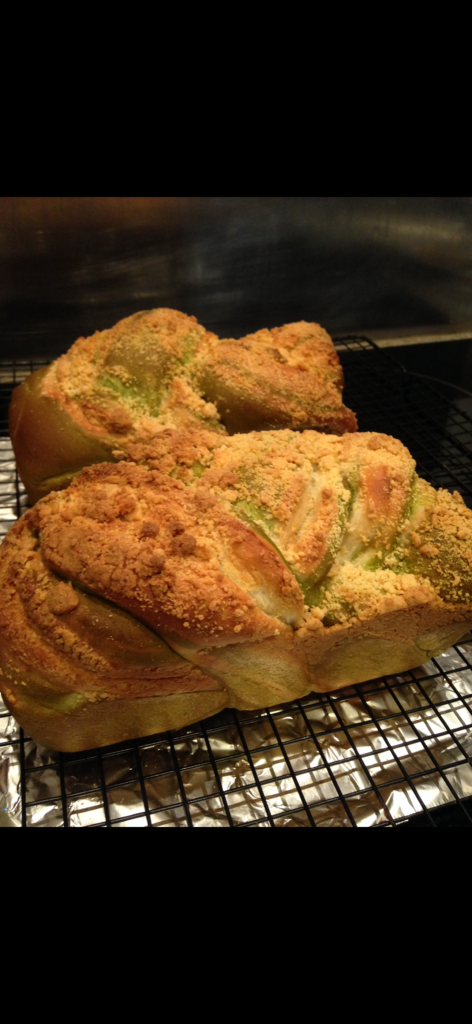
    Soft, fluffy, and beautifully marbled, this Matcha & White Chocolate Marble Milk Bread is a perfect balance of earthy green tea and creamy sweetness. The vibrant swirls make every slice unique, while the tender crumb makes it ideal for breakfast, afternoon tea, or a simple treat with coffee.

    Inspired by Japanese milk bread and my love of matcha, this loaf combines delicate flavours with an eye-catching marble pattern that’s surprisingly easy to create.

    Ingredients

    Dough

    • 500g strong bread flour
    • 40g caster sugar
    • 8g instant yeast
    • 8g fine sea salt
    • 220ml whole milk, lukewarm
    • 1 large egg
    • 50g unsalted butter, softened

    Matcha Dough

    • Half of the prepared dough
    • 8g high-quality matcha powder
    • 1 tbsp milk (if needed)

    White Chocolate

    • 80g white chocolate, finely chopped

    Instructions

    1. Make the dough

    Combine the flour, sugar, yeast, and salt in a mixing bowl.

    Add the milk and egg, then knead until the dough begins to come together.

    Add the softened butter and continue kneading for 10–12 minutes until smooth and elastic.

    2. Divide the dough

    Divide the dough into two equal portions.

    Leave one half plain.

    Mix the matcha powder into the second half, adding a small amount of milk if necessary until the colour is even.

    Cover both doughs and allow to rise until doubled in size, about 1 hour.

    3. Shape the loaf

    Punch down both doughs.

    Roll each into a rectangle of similar size.

    Sprinkle the chopped white chocolate evenly over the plain dough.

    Place the matcha dough on top and gently press together.

    Roll up tightly into a log.

    Twist gently once or twice to create a natural marble effect before placing into a greased loaf tin.

    4. Second proof

    Cover and let rise until the dough reaches about 80–90% of the loaf tin.

    5. Bake

    Preheat the oven to 180°C (160°C fan).

    Bake for 30–35 minutes until golden brown.

    If the loaf browns too quickly, loosely cover with foil during the final 10 minutes.

    Allow to cool completely before slicing.

    Notes

    • Use ceremonial or good-quality culinary matcha for the best colour and flavour.
    • Avoid over-twisting the dough to maintain a clear marble pattern.
    • White chocolate chips can be used instead of chopped chocolate.
    • Store in an airtight container for up to three days.

    Serving Suggestions

    This bread is delicious:

    • Lightly toasted with butter
    • Served with cream cheese
    • Alongside a matcha latte or coffee
    • As a sweet breakfast loaf

    The gentle bitterness of matcha paired with creamy white chocolate creates a beautifully balanced loaf that’s as lovely to look at as it is to eat. Every slice reveals a unique swirl, making this bread perfect for sharing with family and friends.

    © Butterflour. All photographs and content are the property of Butter & Flour and may not be reproduced without permission.

    Screenshot
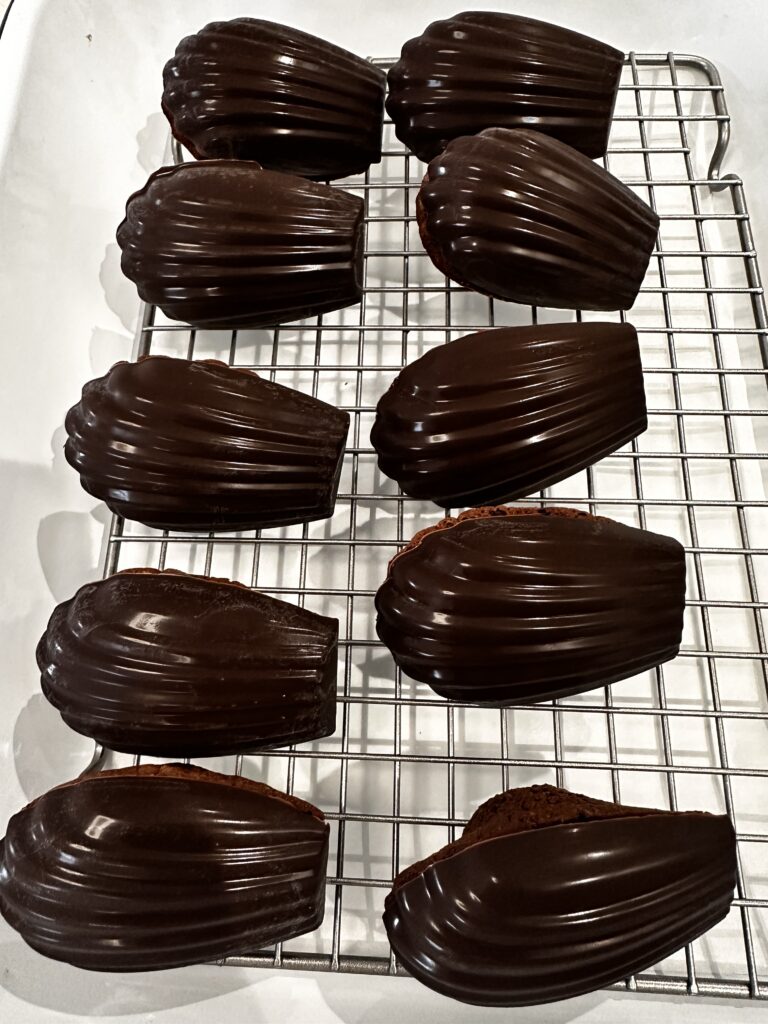
  • Chocolate-Coated Madeleines

    Chocolate-Coated Madeleines

    Madeleines are one of the simplest and most elegant French pastries. While they are delicious on their own, a thin coating of chocolate adds a beautiful contrast to their delicate buttery flavour.

    These chocolate-dipped madeleines combine a light lemon-scented sponge with smooth dark chocolate, making them perfect for afternoon tea, gifting, or simply enjoying with a cup of coffee.

    Ingredients

    For the madeleines

    • 2 large eggs
    • 100g caster sugar
    • 1 tbsp honey
    • Zest of 1 lemon
    • 100g plain flour
    • 4g baking powder
    • 100g unsalted butter, melted and cooled

    For the chocolate coating

    • 150g dark chocolate (60–70% cocoa)
    • Optional: chopped pistachios, freeze-dried raspberries, or toasted almonds

    Instructions

    1. Prepare the batter

    Whisk together the eggs, sugar, honey, and lemon zest until smooth.

    Sift in the flour and baking powder, then gently fold to combine.

    Add the melted butter and mix until smooth.

    Cover and refrigerate for at least 2 hours or overnight.

    2. Bake the madeleines

    Preheat the oven to 190°C (170°C fan).

    Lightly butter a madeleine mould and fill each cavity about three-quarters full.

    Bake for 9–11 minutes until lightly golden.

    Allow to cool completely.

    3. Prepare the chocolate coating

    Melt the dark chocolate over a bain-marie or in short intervals in the microwave.

    If desired, spoon a small amount of melted chocolate into each madeleine mould cavity.

    4. Coat the madeleines

    Place the cooled madeleines back into the mould on top of the chocolate.

    Gently press so the chocolate forms an even layer on the shell side.

    Sprinkle with pistachios, almonds, or freeze-dried raspberries if using.

    Refrigerate for 15–20 minutes until the chocolate is set.

    5. Serve

    Carefully remove the madeleines from the mould and enjoy.

    Notes

    • Dark chocolate provides the best balance to the buttery sponge.
    • White or milk chocolate can also be used.
    • Store in an airtight container for up to three days.

    Serving Suggestions

    These chocolate-dipped madeleines pair beautifully with:

    • Coffee
    • Earl Grey tea
    • Hot chocolate

    The crisp snap of chocolate combined with the soft, buttery crumb makes these little cakes difficult to resist.

    A simple French classic, finished with a touch of indulgence.

    © Butterflour. All photographs and content are the property of Butter & Flour and may not be reproduced without permission.

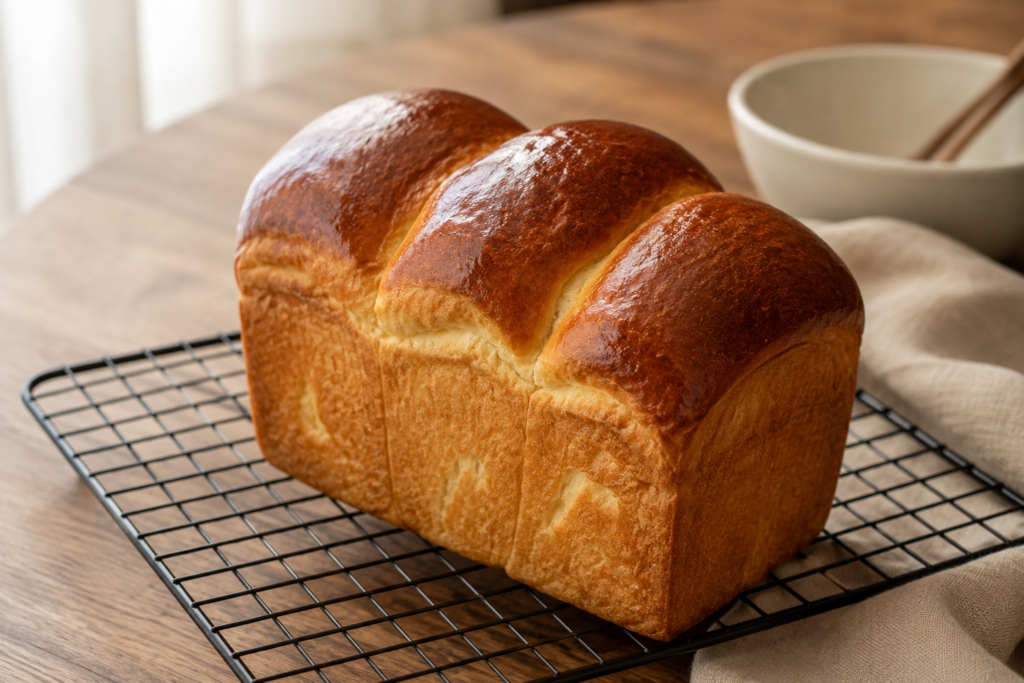
  • Classic French Brioche

    Classic French Brioche

    Rich, buttery, and beautifully soft, brioche is one of the most beloved breads in French baking. With its tender crumb and delicate sweetness, it sits somewhere between bread and pastry, making it perfect for breakfast, afternoon tea, or simply enjoyed on its own.

    Although brioche requires a little patience, the result is well worth the effort. The dough develops its characteristic texture through slow mixing and the gradual addition of butter, creating a loaf that is light, airy, and wonderfully rich.

    Ingredients

    For the dough

    • 500g strong bread flour
    • 10g fine sea salt
    • 50g caster sugar
    • 10g instant yeast
    • 5 large eggs, room temperature
    • 250g unsalted butter, softened and cut into cubes

    For the egg wash

    • 1 egg
    • 1 tbsp milk

    Instructions

    1. Prepare the dough

    In the bowl of a stand mixer fitted with a dough hook, combine the flour, salt, sugar, and yeast. Add the eggs and mix on low speed until a rough dough forms.

    Continue kneading for 8–10 minutes until the dough becomes smooth and elastic.

    2. Add the butter

    Gradually add the softened butter, a few cubes at a time, allowing each addition to be incorporated before adding more.

    Continue mixing for 10–15 minutes until the dough is smooth, glossy, and pulls away from the sides of the bowl.

    3. First fermentation

    Transfer the dough to a lightly greased bowl, cover, and leave at room temperature for 1–2 hours until slightly risen.

    4. Chill overnight

    Gently deflate the dough, cover, and refrigerate overnight. Chilling makes the dough easier to handle and improves flavour.

    5. Shape the brioche

    The following day, remove the dough from the refrigerator.

    Shape into a loaf or divide into small portions for individual brioche buns. Place into a buttered loaf tin or brioche mould.

    6. Final proof

    Cover loosely and leave to rise until doubled in size, about 2–3 hours depending on room temperature.

    7. Bake

    Preheat the oven to 180°C (160°C fan).

    Mix the egg and milk together and gently brush over the surface of the dough.

    Bake for:

    • Loaf brioche: 30–35 minutes
    • Individual brioche buns: 15–18 minutes

    The brioche should be deeply golden and sound hollow when tapped.

    8. Cool

    Allow to cool before slicing.

    Notes

    • Use room-temperature eggs and soft butter for the best dough development.
    • The dough may seem very sticky at first; avoid adding extra flour.
    • Overnight chilling greatly improves both flavour and texture.
    • Brioche freezes well and can be refreshed in a warm oven before serving.

    Serving Suggestions

    Brioche is delicious served:

    • Warm with butter and jam
    • As French toast
    • Filled with pastry cream
    • Alongside coffee or tea

    Soft, buttery, and wonderfully versatile, brioche is a classic French bake that rewards patience with every slice.

    Thanks❤️

    © Butterflour. All photographs and content are the property of Butter & Flour and may not be reproduced without permission.